
Neon lights are fun. They are 80s, they are bright and they are the most obnoxious way to get the message out there. However, not all of us can afford to deck the walls in them and sometimes those little flamingos on a stand don’t quite cut it. So, with this DIY, you can neon up the entire house if you wish and it won’t affect your electricity bill. Nice.
MATERIALS:
- neon yarn
- french knitting spool and needle
- scissors
- soft wire
- wire cutters
- printer or black marker (optional)

INSTRUCTIONS:
1. Thread yarn through the top of the spool so it sticks out the bottom.

2. Grip the spool and use your little finger to hold down the tail while you loop the yarn clockwise around a peg.

3. Continue on to all four pegs.

4. Do another lap around all four pegs.

5. Use the needle to loop the bottom thread on a peg over the top thread - leaving just one thread behind. Do this for all four pegs. Pull on the tail.

6. Carry on with this until you have at least 2.5 metres all up of stitching (maybe more if you’re especially adventurous?)

7. To cast off, lift one stitch off it’s peg and carry it over to the next one. Lift the stitch below over it and repeat this until all stitches are removed. Cut the yarn and pull on it tight to hold it in place.

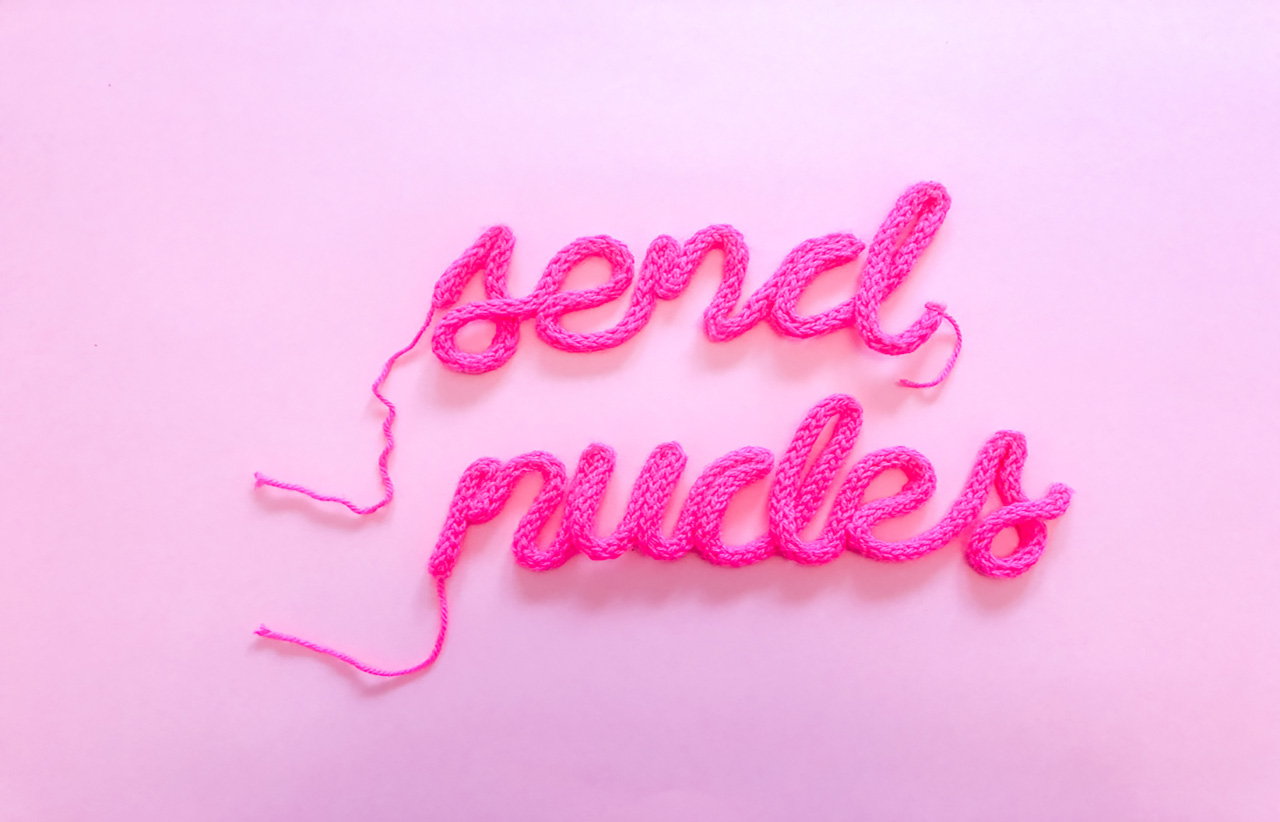
8. Now you get to be as creative as you like with your sign. I am bloody useless at drawing so I grabbed a nice cursive font and printed out one word per A4 page to use as my template. But, if you’re better at life than I am, then you can go XXL with your sign - just remember it needs to be a cursive font, please.

9. This next stage may cause some tantrums, I’m not going to lie to you. The best thing to do would be to make sure one end of the wire is softened (or you can trim it to a point) so that it’s easier to work with. You need to thread the wire through the inside of the ... thing … you’ve just made. Be kind to yourself during this process. Maybe go make a cup of tea.

10. When you’ve got it all threaded through, you can now lay it down on your template and shape the wire to create the text. This also requires patience. I’m sorry. When you’ve got it all how you want it, trim off the wire and cut the stitching. You should be able to tie a knot at the end which will hold it in place and guess WHAT. YOU’RE DONE.